CSV File Import Parameters dialog
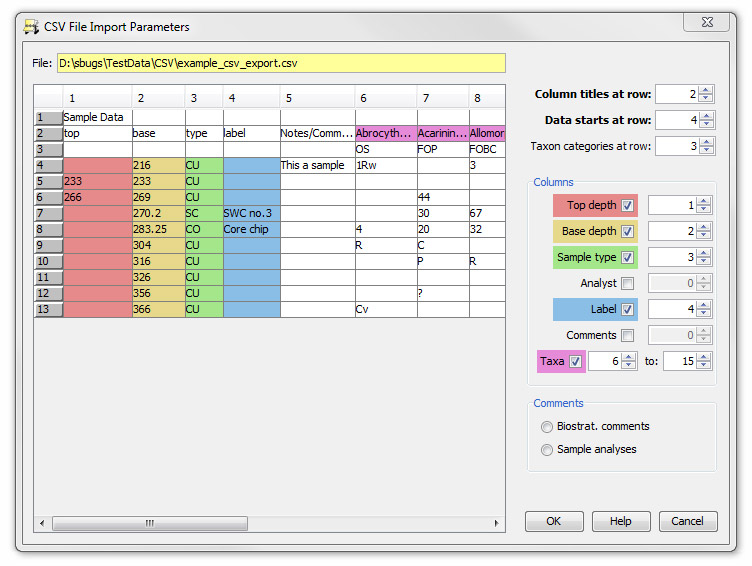
This dialog enables you to ensure that items in a CSV are correctly imported into StrataBugs. You can import CSV files from the Organiser module, by selecting File > Open File > CSV, or starting a guided import and selecting a CSV file.
The file's data are displayed as a spreadsheet. Coloured shading helps to identify sample Top depth and Base depth, Sample type, Analyst, Label, Comments (if any) and Taxon names. StrataBugs uses a number of rules to identify these items, but if it fails then you can intervene using the check boxes and spinners to reposition the colours and thus identify the data types. You must also use the appropriate radio buttons to select to import any comments as Biostratigraphic Comments or as Sample Analyses comments.
If you are importing data from Excel spreadsheets, you may need to modify the layout slightly. An example of the layout StrataBugs expects can be found here. You should then save your spreadsheet as a .CSV file before attempting to read it into StrataBugs.
Notes:
- The reader will correctly parse a single depth column with duel depths where they are separated by a hyphen (e.g. 100-120), just select this column as either top depth or base depth.
- Abundances of "+" or "*" will be read as outside the count.
- "Rw", "Cv" and "?" (not case-sensitive) at the start or end of any field are parsed as reworked, caved and questionable qualifiers respectively.
- "Rw", "Cv" and "?" with no accompanying count or semi-quant will be parsed as outside the count.
- If the reader encounters numerical and semi-quant in the same field (e.g. 3R, C5, 34ARw), the numerical count will be used and the semi-quant discarded. This is because In v2.0 you cannot have quantitative and semi-quantitative data in the same occurrence (although it is permitted in the same analysis). A warning message at the end of the file reading process will appear if any such fields have been encountered - you may wish to revise the CSV file in this case.
When you press OK the File Import Parameters dialog opens. Add additional information about the data set that you are importing.
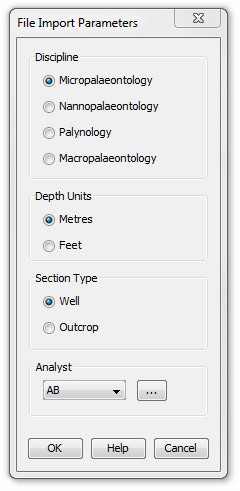 |
Select the correct Discipline, Depth Units, Section Type and Analyst. You can view more information on the analysts in your database by pressing the ellipsis (...) button to open the Select Analyst dialog. |
Data in separate files
You may have analyses in separate CSV files which need to be combined into the same analyses, for instance you might have a spreadsheet containing Dinoflagellate Cysts only, and a separate spreadsheet containing Pollen and Spore data. It is difficult to merge these spreadsheets, especially if they cover different sample ranges. The procedure here would be to import the data separately into two different analysis suites - use the same analyst name, but record one as suite 1 and the other as suite 2. When the data are imported, open the Samples & Interpretations module, and Merge the analyses in suite 2 to those in suite 1, using the merge option from the Analyses menu.
Page last updated: 03-Dec-2014 10:17