Palaeoenvironment: Add/Edit dialogs
This dialog enables you to record an interpretation of palaeoenvironment for a particular depth interval for display in a separate panel on a chart. More about palaeoenvironments...
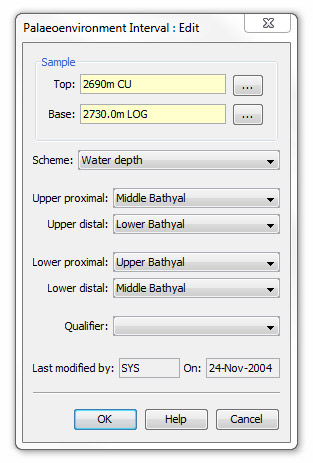
First enter the top and base depths of the interval to which the interpretation applies by pressing the ellipsis buttons (...). This will open the Sample: Select dialog. Note that these fields will automatically be filled with the samples you have selected on the Samples tab.
Select a paleoenvironmental Scheme from the drop down list. Use the Schemes module to add or edit schemes.
You should only use one palaeoenvironment scheme per version. No intervals are allowed to overlap, even if they are from different schemes. To honour historical data, where intervals in the same version use different schemes, they will be displayed in the table. You can allow mixture of different schemes via a system setting on the main control panel (can only be changed by a super user). Usually if you need to add intervals using a different scheme, you should add them in a different interpretation version.
The next four fields should be regarded as the four corners of a labeled rectangle. "Upper proximal" is the top left and "Upper distal" the top right corner of the rectangle; "Lower proximal" and "Lower distal" the bottom left and right corners, respectively. Select units for each field using the drop down list attached to each which best describe the range of environments at the top and base of the interval. The range in each case may span any number of units or be restricted to one.
Next select a Qualifier (optional) from the the drop down list on the Qualifier field to modify the way the interval is displayed.
Note: Unlike for other interpreted data types, you cannot create informal terms of the palaeoenvironmental units.
The Last modified by/on are automatically filled.
Page last updated: 02-Dec-2014 10:19