| << Previous | Learning Trail | Contents | Section 8: Organiser | Next >> |
| StrataBugs Learning Trail | Section 8: Organiser |
How to export data using Organiser
General procedure for exporting data
- Select and open well(s) in the Organiser main frame.
- View the database data; select the version you wish to export, exclude particular wells or data types.
- Save to file.
Compatibility note: You can exchange data between v2 and older versions of StrataBugs via the DEX format - Organiser v2 is capable of both writing and reading this format. However because of data model changes the DEX format cannot capture all data from v2, so you should use the SBG format wherever possible.
Guided Export
The Guided Export function guides you step by step through the process of exporting data from your database to a file. You can exit the procedure at any time by pressing Cancel. Guided exports are a quick, convenient way of exporting data types of your choice from a well or project. If need more control over which data items are exported (for example if you just want to export half of the samples), you should follow the steps for a non-guided export below.
To start a guided export, select the File | Guided Export menu item or click the guided export toolbar icon. You can select more than one well to export at the same time, either by selecting a project to export or choosing multiple wells from the Well : Select dialog. Next you will be asked to see the Select Data Types dialog; tick the boxes next to all those types you wish to export. Finally you must select the name and location of the new file.
The file produced by the guided export is an XML file which is automatically bundled, along with any image files exported, into a compressed 'zip' archive file with the file extension '.sbg'. This is the standard data exchange format for v2. You can still use the guided process to export files of a different type: when the file selector shows at the last stage, press Cancel, and then select File | Save to file and select the desired file type.
Non-Guided Export
- First, select wells or projects to open via the File | Open wells... or File | Open project... or by pressing the
 open wells or
  open projects toolbar icons (you will see the Select Wells dialog or the Select Project dialog).
 - You may now select which versions, wells and data types you wish to export.
To select data types, select View | Data types or press the
 view data types toolbar icon, and check the data types you wish to export.
You can open this dialog again and make a different selection if you wish.
view data types toolbar icon, and check the data types you wish to export.
You can open this dialog again and make a different selection if you wish.To remove wells, select them in the table (CTRL + click or SHIFT + click to select multiple wells) and then select View | Exclude selected wells. To add more wells, open wells via the File menu or toolbar, and when asked if you want to "clear data from workspace", choose No.
To exclude specific data items, double-click in the table column to open the appropriate Match dialog. In these dialogs, select whichever rows you wish you exclude and click Exclude. If you need to re-include those data later on, you will need to remove that well (as above) and add it again.
You can add or remove version tabs using the View | Versions or Remove Selected Version options from the menu bar. Note that for XML/SBG exports, each version tab will be exported. For DEX format files, which do not support multi-version data, only the non-versioned data and data on any one other selected version tab will be exported.
- Load the data from the database into the workspace, by selecting View | Load database data into workspace. (This may take a few seconds if there are a lot of data).
- To save the file, select File | Save to file and choose your file type, or press the
 save to file toolbar icon, which will save your data into a .SBG file (more information on file types).
Note that if the file type selected does not support multiple versions (this includes DEX files), you must first select the tab for the version you want to export. The version name is not included in the file, so when it is imported it will be tagged "Default Version", even if you did not export your default version.
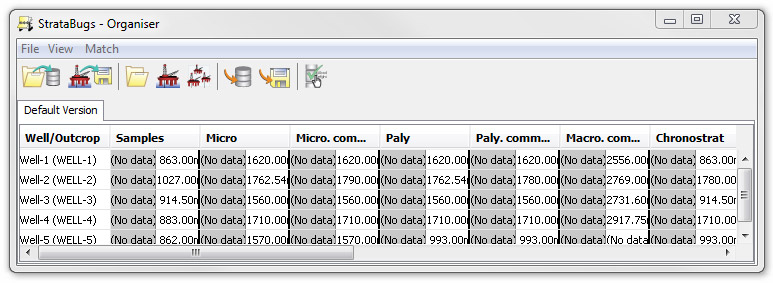
The table now shows two tabs, each with a row for each well and a column for each data type. The first tab is for non-version data (e.g. samples and analyses). The second tab shows the default version. To open other versions in their own tabs, click View | Version. The left-hand part of each cell (the Workspace) is empty and grey, and the right-hand parts of each cell (the database) show the data in each well.
Page last updated: 05-Dec-2014 11:50