Samples tab
This is where you view, add and edit information about samples in a well in the Samples table, which has several shortcuts built in.
Hint: visit this page for information on table colours.
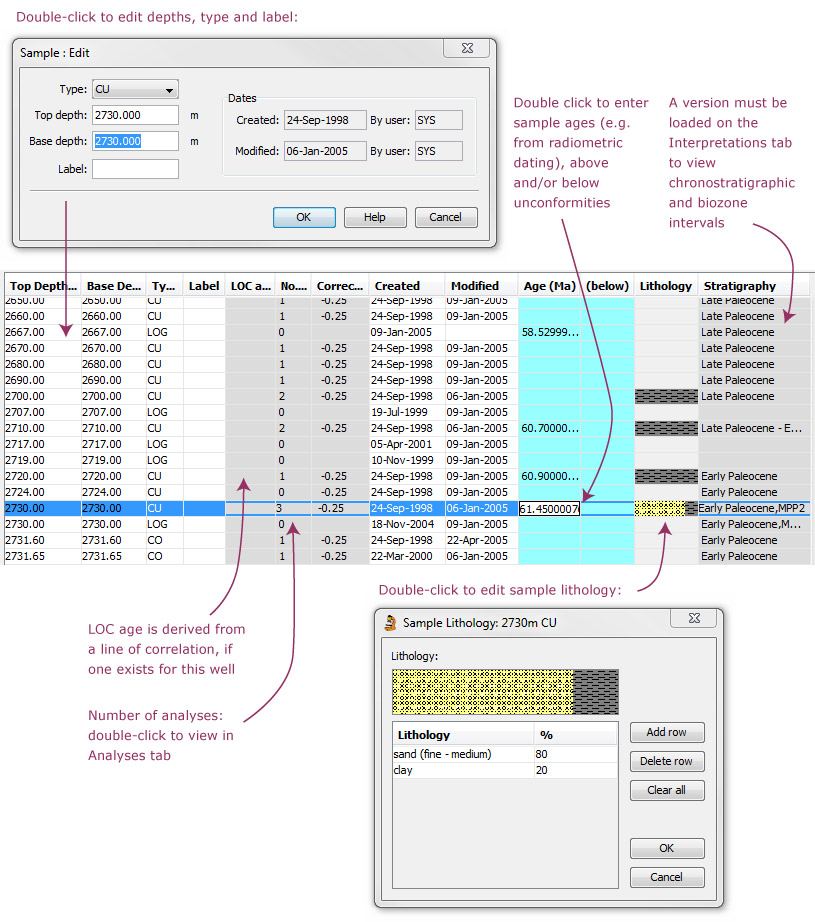
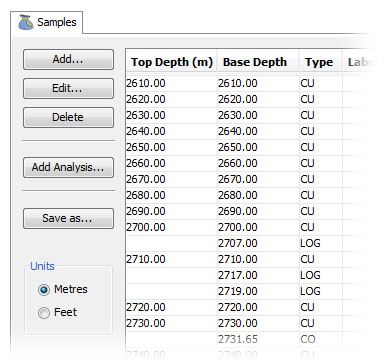
Add... and Edit... open the Sample dialog, where you can edit the type, depths and label of a sample. You can also open this dialog by double-clicking on an existing sample in the table.
You can Delete one or many samples by selecting them and pressing the button, or using the DEL key on your keyboard. You are allowed to delete a sample which has analyses (these will also be deleted), but you are not allowed to delete samples which are linked to interpretations - you must delete these separately first.
Select a sample and press Add Analysis to create an analysis of the sample. If you have only one analysis suite, it will automatically be used; in other cases you will be prompted to select one from a list.
Save as allows you to output a simple CSV report of the sample list, optionally including a summary matrix of the analyses.
You may view the table in metres or feet; by default the table will use the units set for the well.
From here...
Select one or more samples you wish to analyse and press Add Analysis. You will have to select (or create) an analyst suite, and enter details of the analysis. The module then automatically switches you to the Analyses tab, where your new analysis is highlighted and has a 'prepared' status.
Page last updated: 03-Dec-2014 15:51