Month: January 2019
StrataBugs v2.1.1 – overriding well block templates in individual wells
Some months ago we started to work on an improvement to the new charts system to address what seemed to be a very common question: “Can I just change this panel in this one well?” The results are now available to everyone in version 2.1.1.
Recap on well block templates
A block template is an ordered list of panel templates, with captions. It is a saved design layout, usually belonging to one project, which can be used to display data from any well. It makes sense to be able create a standardised chart for each well in a project, especially where the different wells have similar data content which might be need to analysed or displayed in the same way. Because “charts” are always coupled to their templates, you can change your mind about the layout or design without having to edit a chart for every single well – just make the change to the template, and all your charts will be updated. This is far cleaner and more flexible than having separate charts for each well (as was the process in the old charts model).
So far so good, but it seems that standardisation can only go so far. Different wells have their quirks, and you need to tweak the design ever so slightly in some cases. Perhaps a different wireline log here, or a slightly different group of taxa there. In the original 2.1 charts module the only way you can do this is to duplicate the block template – probably giving it a name specific to the well for which you needed to make the tweak. Suddenly, instead of having one block template which is neatly shared around the project, you’ve got a separate “template” for each well and you’ve lost all the benefits of having templates in the first place.
New overrides feature
We wanted to allow the flexibility to tweak chart design for individual wells, whilst retaining the benefits of the template-driven model. Version 2.1.1 handles the complexities internally, giving you just a simple option to change some panel properties in individual wells, if you wish, and see those changes reflected wherever you use that template to display that well. You can still make changes to the base template and see them reflected everywhere.
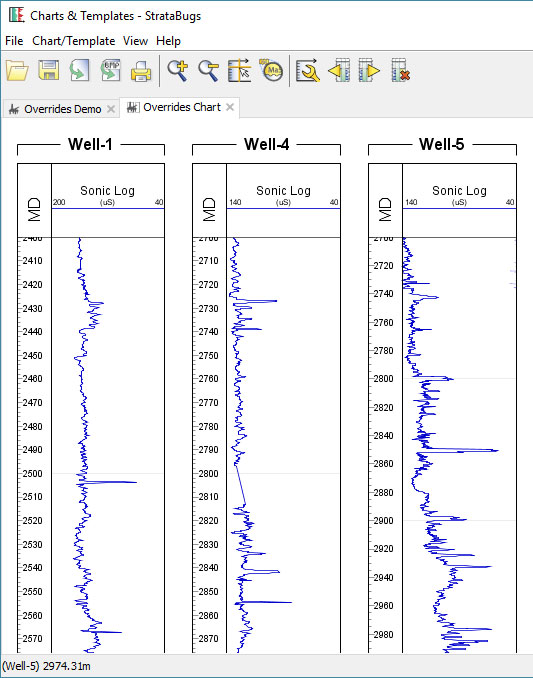
Here is a simple example. I create a well block template with one panel, showing the sonic log. I create a new chart and add some blocks for wells in my project, using my new template.
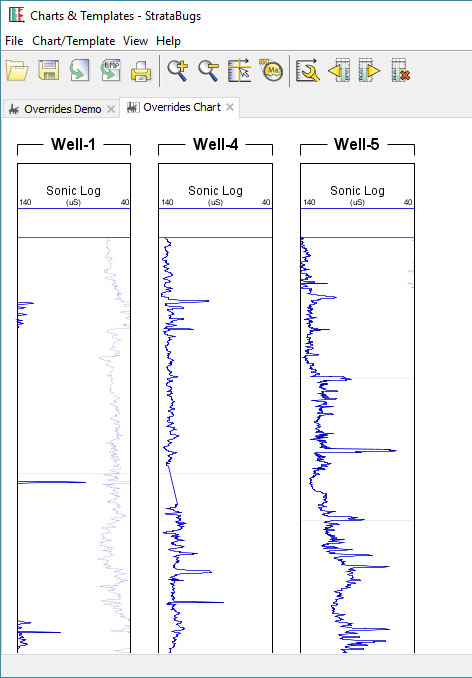
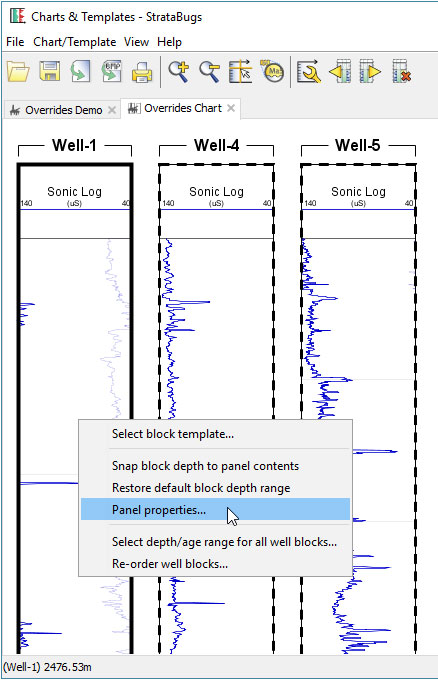
The horizontal log scale looks fine for Well-4 and Well-5, but it’s not great for Well-1. Previously I would have had to make a compromise and decided on a scale which I could use for all wells (or create a separate well block template just for Well-1). With v2.1.1 I can right-click on the panel in Well-1 and select Panel Properties:
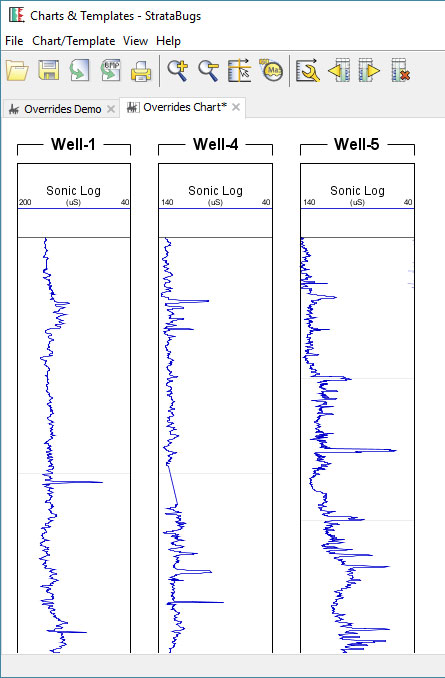
After adjusting the DT (sonic) scale, my chart is looking better.
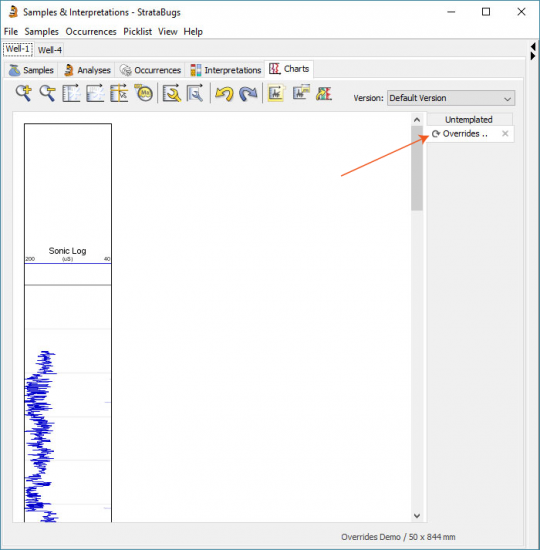
When I have saved this chart, my override for this panel for Well-1 will be saved and applied whenever else I open this template for Well-1. So if I open a tab for it in Samples & Interpretations, my new scale applies. An arrow symbol in tab indicates that this block template has panel overrides in this well.
If I make a change to the block template, e.g. I add a depth scale panel, it updates for all wells.
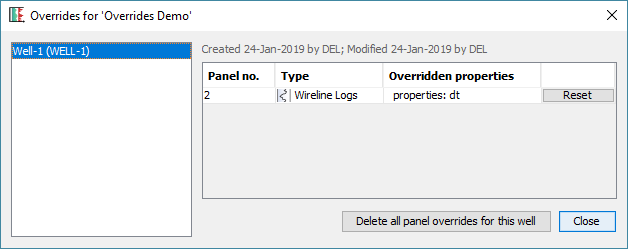
You can see which wells have overrides (and delete them if necessary) by opening the template in Charts & Templates, and selecting Chart/Template > Overrides.
In Summary
All you have to do is right-click on any templated chart block, choose Panel Properties, and then save the resulting chart. The block template will behave differently for that well, whenever you use it. You can’t change the order of panels and you can’t add or remove them – these must be done in the underlying block template.
Don’t be tempted to make the same change to a panel for each of your wells that use a template: it’s still better to change the underlying template instead.
To use this feature you will need to be running version 2.1.1. You can download this using the normal updater (select the version at the top, and make sure you get the “Latest” release), but you will need to upgrade your database as well.
New “spot cutting” sample type
The latest release of version 2.1.1 contains a new entry in the list of available sample types: the ‘spot’ or ‘bottoms-up’ cutting, SP.
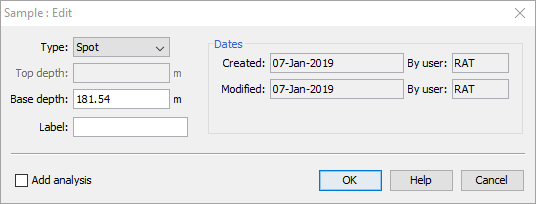
Spot cuttings are taken by pausing the downward drilling and waiting for the cuttings to arrive from the bottom of the hole. When drilling is restarted, the exact depth is known from the length of the drill string, giving a more precise depth.
The sample depth has the same precision as for a core sample since the cutting is taken from a known depth, but it is still a cutting sample.
When applying core shifts, Spot samples are shifted using the same settings for Core samples, not cuttings samples. So, if Core samples are shifted then Spot samples will be shifted. You can optionally decide whether to also shift Cuttings samples.
You can choose whether to display spot cuttings on charts. Existing samples panel templates will display SP samples in line with their setting for cuttings.
Note that in a multi-user environment, all users should update to the latest version before SP samples are added to the database, or any new samples will be seen as just cuttings.